Main View
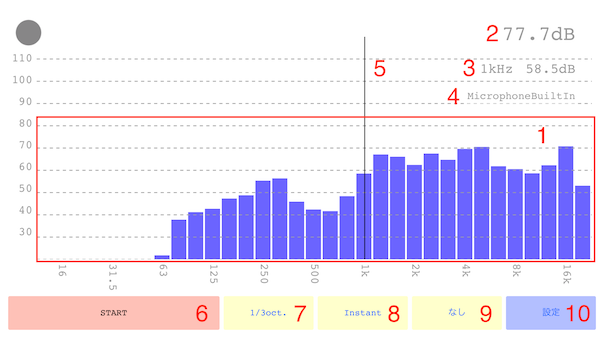
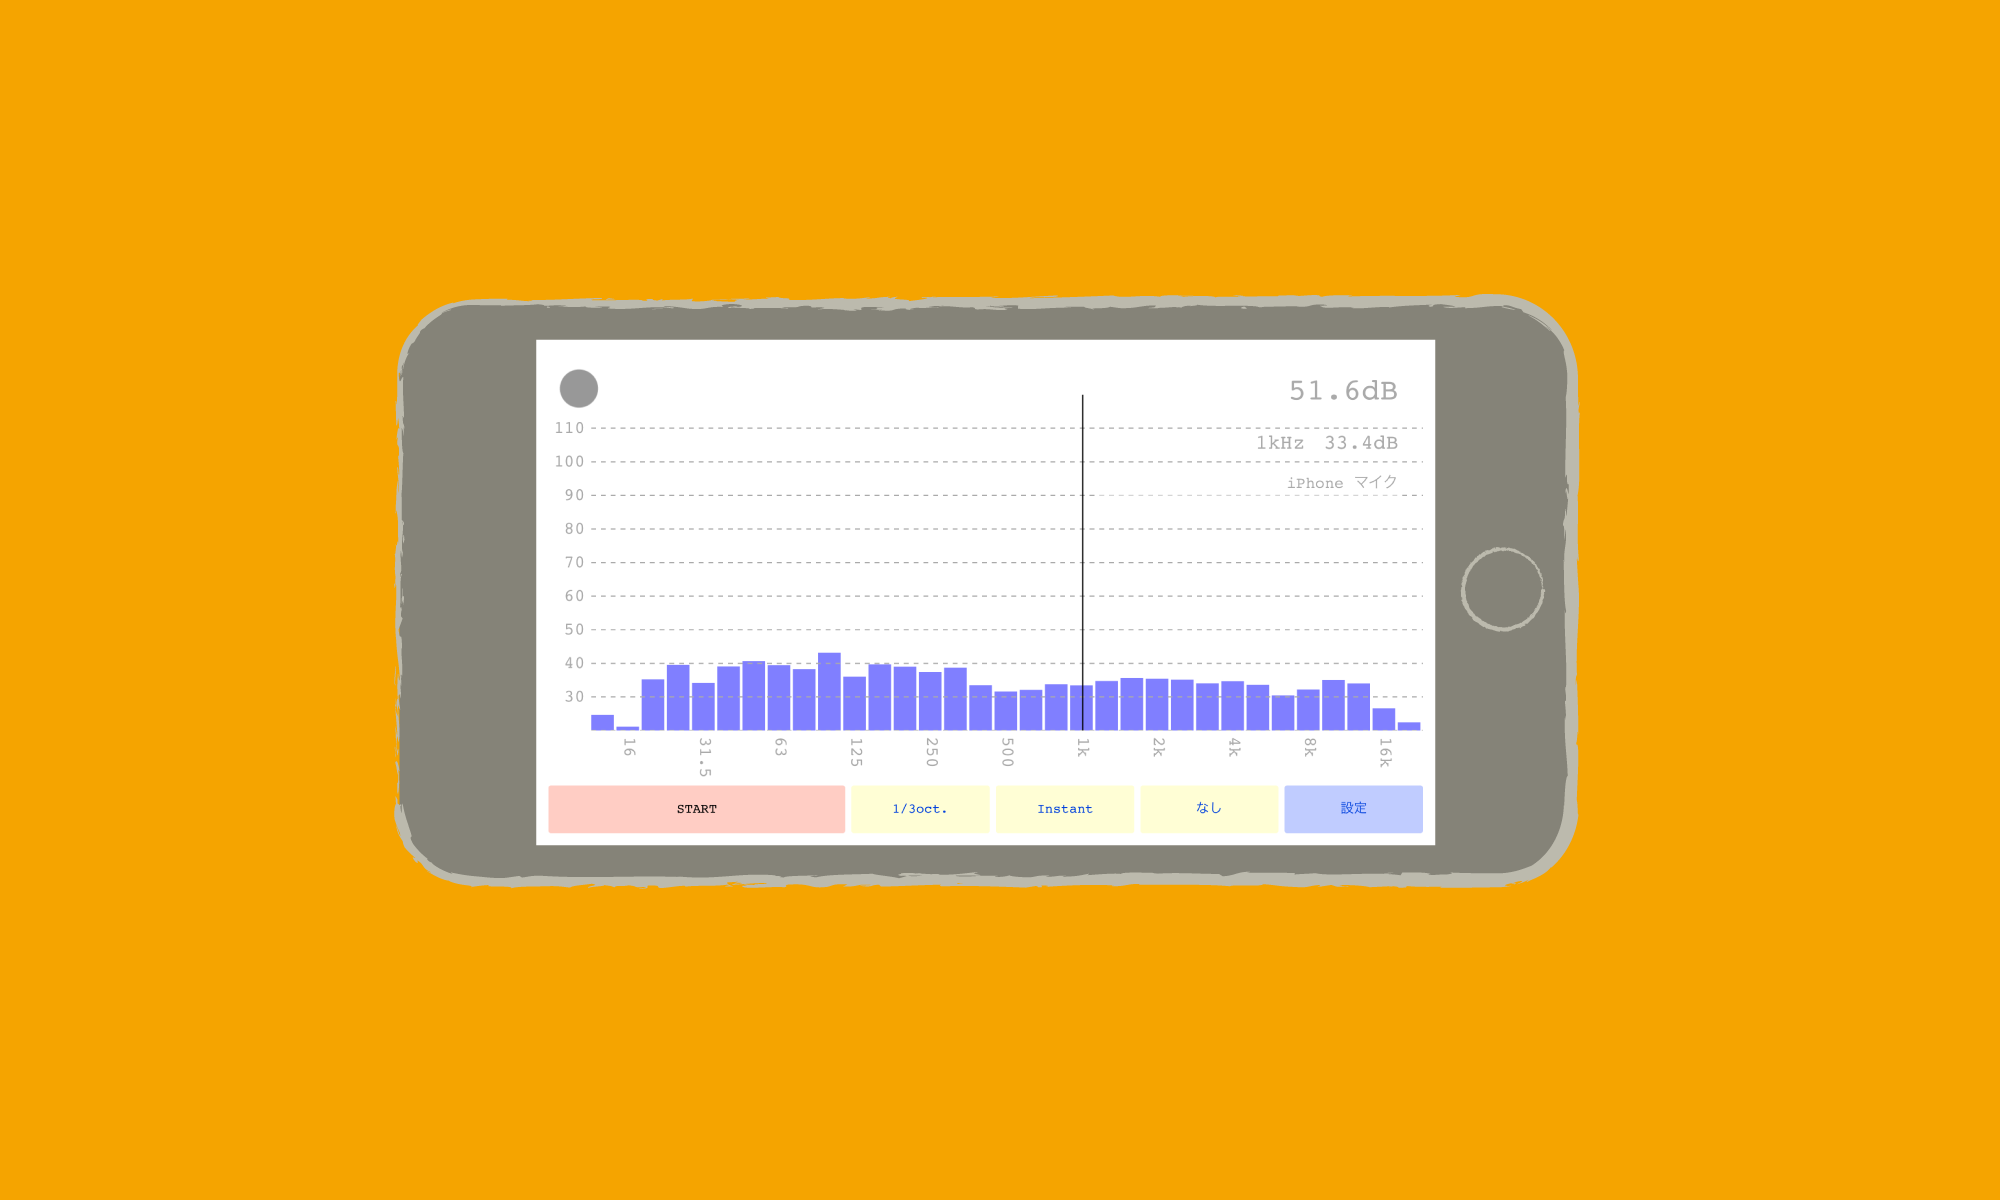
1. Graph Area
Displays level with frequency (Hz) on horizontal axis and power level (dB) on vertical axis
2. Level Display Area
Shows total power level. The value reflects frequency weighting from 9
3. Cursor Level Display Area
Shows cursor position (Hz) and power level (dB) at that point
4. Device Display Area
Shows currently used device
5. Cursor
The cursor
6. Start/Stop Button
Toggles analysis Start/Stop
7. Octave Width Toggle Button
Switches between 1/1 and 1/3
8. Time Constant Toggle Button
Switches between Fast/Slow/Instant
9. Frequency Weighting Toggle Button
Switches between A/C/F characteristics
10. Settings Button
Moves to settings screen
Settings View

1. Recording Checkbox
When this checkbox is on and Start/Stop button is pressed, measurement results are saved to file
2. File List
Moves to recorded file list
3. Microphone Display
Shows currently used microphone name
4. Microphone Settings Button
Moves to microphone list
Recording List View
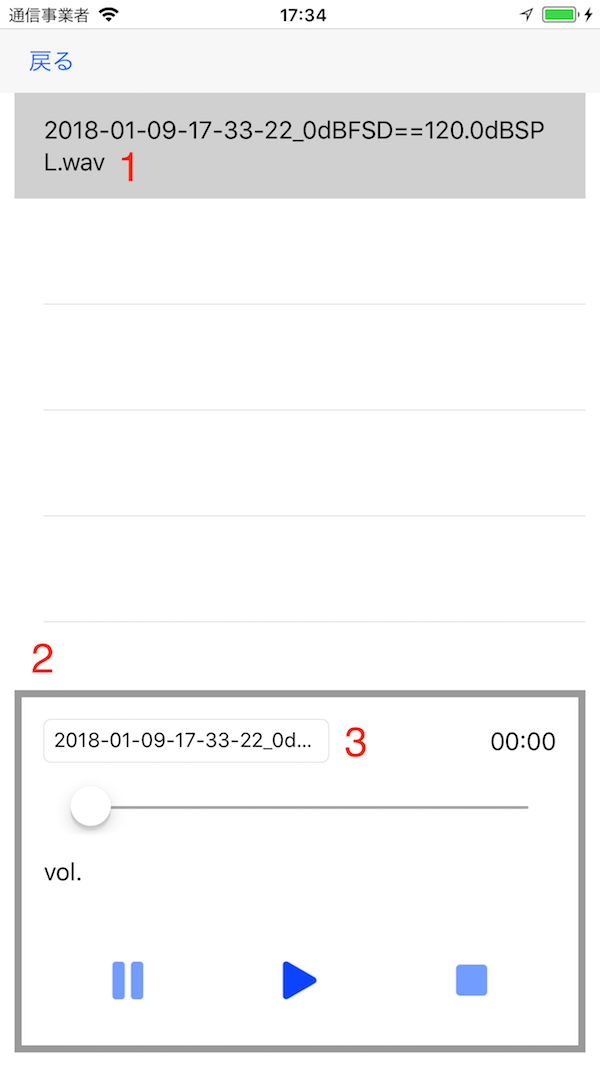
1. File Selection
Select a file to start playback. Filename format is "Y-M-D-h-m_0dBFSD==_NNN_dBSPL.wav" where NNN indicates how many dB SPL corresponds to 0dBFS
2. Playback Controller
Controls the playing file
3. Filename Change
Enter string to add at the beginning of filename
Microphone List View
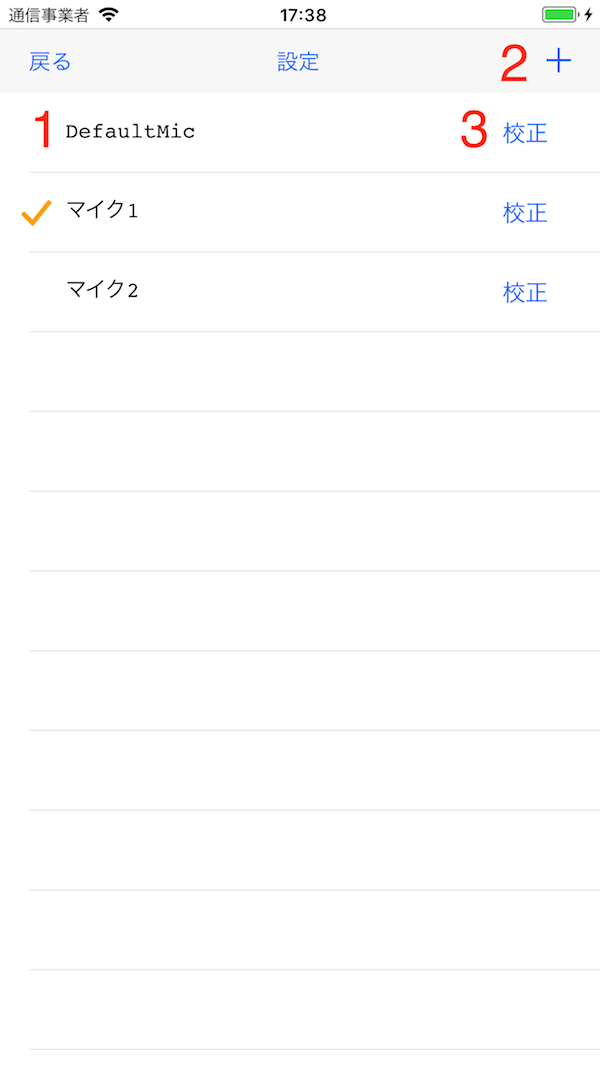
1. Microphone Selection Button
Switches currently used microphone
2. Microphone Settings Button
Moves to detailed microphone settings screen
Microphone Settings View
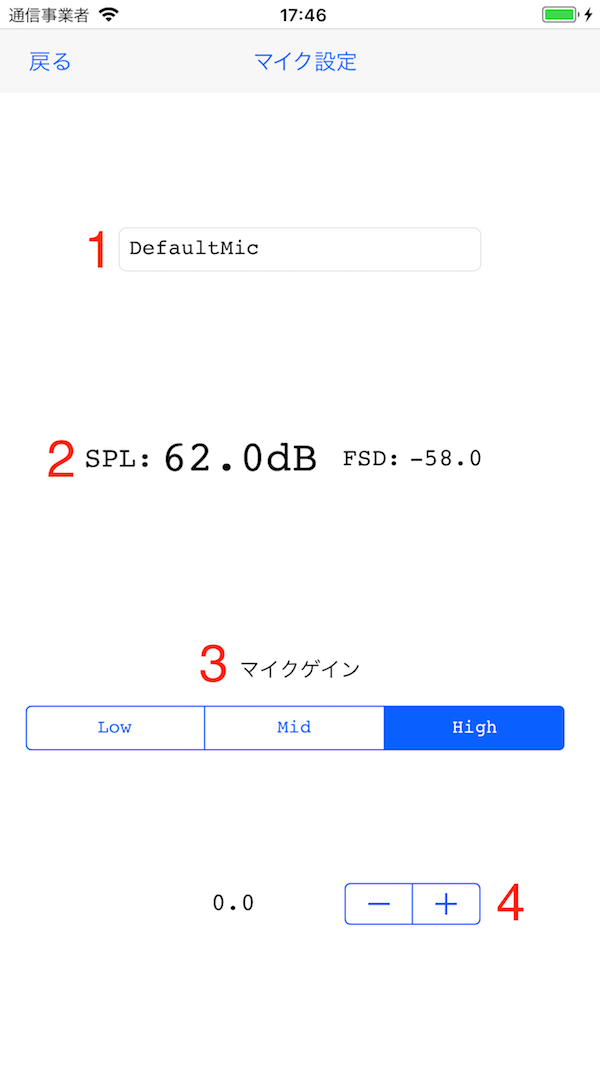
1. Gain Toggle
Switches input gain between HIGH/MID/LOW
2. Gain Adjustment
Fine-tunes gain. While listening to 1kHz 94dB or 104dB tone, adjust so that level (3) shows 94dB or 104dB
3. Level
Shows current level